Monday, August 29, 2011

Never Enough Birthday Cards


Have I mentioned I love this embossing folder? Well I do and I can't stop using it. When I don't have a specific person in mind when I make a card I usually try to keep it a little more basic. That way I can just use a layout I like and then make a bunch. They are always nice to have on hand and you can never have enough birthday cards.

Sunday, August 28, 2011

Gray and Yellow

I'm on a Gray color kick. It has become a nice neutral color that I use. It goes well with a lot of things. I really like how it looked embossed as well.


I inked the edges and I used a cuttlebug die to make the tag that is on the yellow ribbon. The Gray cardstock is embossed with a Houndstooth embossing folder.

It isn't the best picture. I really need to find a good place in my new apartment to take pictures. We don't get a lot of direct sunlight and I'd rather not have to haul the kids outside in the Florida heat to take pictures of cards :)

Saturday, August 27, 2011

Mini Square cards

Sometimes I get tired of the same old A2 size cards I usually make. I like to make square cards as well. I think they look really cute and it is easier to use my scraps of paper I have left over on smaller cards.


I used an embossing folder for the background paper. I made the tag by cutting cardstock with a 1 inch punch. Then I used my crop-a-dile to add the eyelet.


What do you think?

Monday, August 22, 2011

New Craft Space

Can I just say that I LOVE Ikea. I got some awesome things there to make my craft space more functional AND pretty. I love that I have everything I need accessible and there is still room for more stuff :)

The table used to be my kitchen table and the white compartment is from Ikea. It has another one that can go with it but I'll be getting that one at a different time.

I have plenty of storage for now with what I have. I love the shelves...also from Ikea.


The metal tins and jar with the ribbon in it is also from Ikea. The metal plate on the wall is from Home depot and the metal containers are from Ikea.

I think you will be seeing a lot more crafts in the near future :)


Thursday, August 18, 2011

Reader brag post

Have you created something lately? I want to see what all of you have been up to. Send me a picture and a brief description and I will post it for you on my blog.

My good friend and Sweedish Weave mentor was kind enough to send me some pictures of some projects she has done. I just wanted to share because they are amazing!


I love the black monks cloth with the white and gold yarn. In case you didn't know that is a Purdue Sweedish Weave. It is even more stunning in person. If the thought of a large project scares you just start small. Do a tea-towel or a table runner.

Seriously this is one of my favorite things to do. It is so relaxing and totally addictive. And you can do it while you watch tv or a movie :)

If you have any project that you'd like to share just shoot me an email briellekennington@gmail.com it doesn't have to be a sweedish weave...I want to see anything and everything.

Tuesday, August 16, 2011

An Introduction to Sweedish Weave Part 2

If you missed An Introduction to Sweedish Weave Part 1 you can find it here.

Did you buy your patterns and Monks cloth? Have you prepped your fabric? Alright we are ready to move onto the next part. Before you begin weaving you will need to find the center of your Monks cloth. You could use a measuring tape to find the center or you could count all the tiny woven squares. Those would be very accurate ways of doing it. I like to do it a different way. Lay your Monks cloth on a flat surface.


Fold the Monks cloth in half length wise. Make sure you line up the edges and corners very well.


Fold the Monk cloth in half again. Make sure you line up the edges and corners exactly.


Find the folded corner.


Thread some colored yarn (different color then you will be using on your project) into a yarn needle. Then weave it into the center of the corner.


Pull the needle through along with the yarn.


Tie a knot with the yarn.


Now you will be able to easily find the center of your Monks cloth. It will be easy to spot the different colored yarn and it won't pull and tug at your Monks cloth like a safety pin would.


See the yarn in the middle of the cloth?

Now you are ready to get started but you will need to understand a few things about reading the pattern. I found a great video that will give you all the information you need to get started reading Sweedish Weave patterns.


Here are more stitches you may need to know.


If you have any questions please leave me a comment or send me an email. Happy Weaving :)

Saturday, August 6, 2011

Kids Card-making

I don't know about your kids but my kiddo loves to do crafts. He asks me pretty much every day to do a craft. Sometimes I get a little tired of just the normal crayons and construction paper art. I try to come up with fun things he can do to keep both of us interested. I like crafts that are useful...ones you can do something with instead of just taping them up on the fridge. Check out what my 2 year old made...


Adorable right? Check out this one...


Let me show you how I helped Austin make these cards. First you will need a piece of card stock. Then you will need to pick out a stamp that your toddler can hold onto by himself.


I let Austin pick out which color stamp pads he wanted to use for the dragonfly stamp. For the feather I have to admit that I let him choose from colors that went well together :)


Then just let them go at it.


He was pretty proud of his creation. I cut the paper in half and then folded it in half. Then I let him pick out a ribbon and he helped me tie it around the card. It was a lot of fun and it kept him occupied for a good amount of time. Just be careful because the ink won't come out of cloths so you may want to have your child wear play cloths.


I think I know of some grandma's and grandpa's that would love to receive these in the mail. :)

Happy Stamping!

Wednesday, August 3, 2011

An Introduction to Sweedish Weave

 I am really excited about this post. I had the wonderful opportunity to learn about Sweedish Weave from a good friend. As I started getting into it and wanting to learn more, I noticed there wasn't very much information about it online. After completing my first project I was eager to start another one.

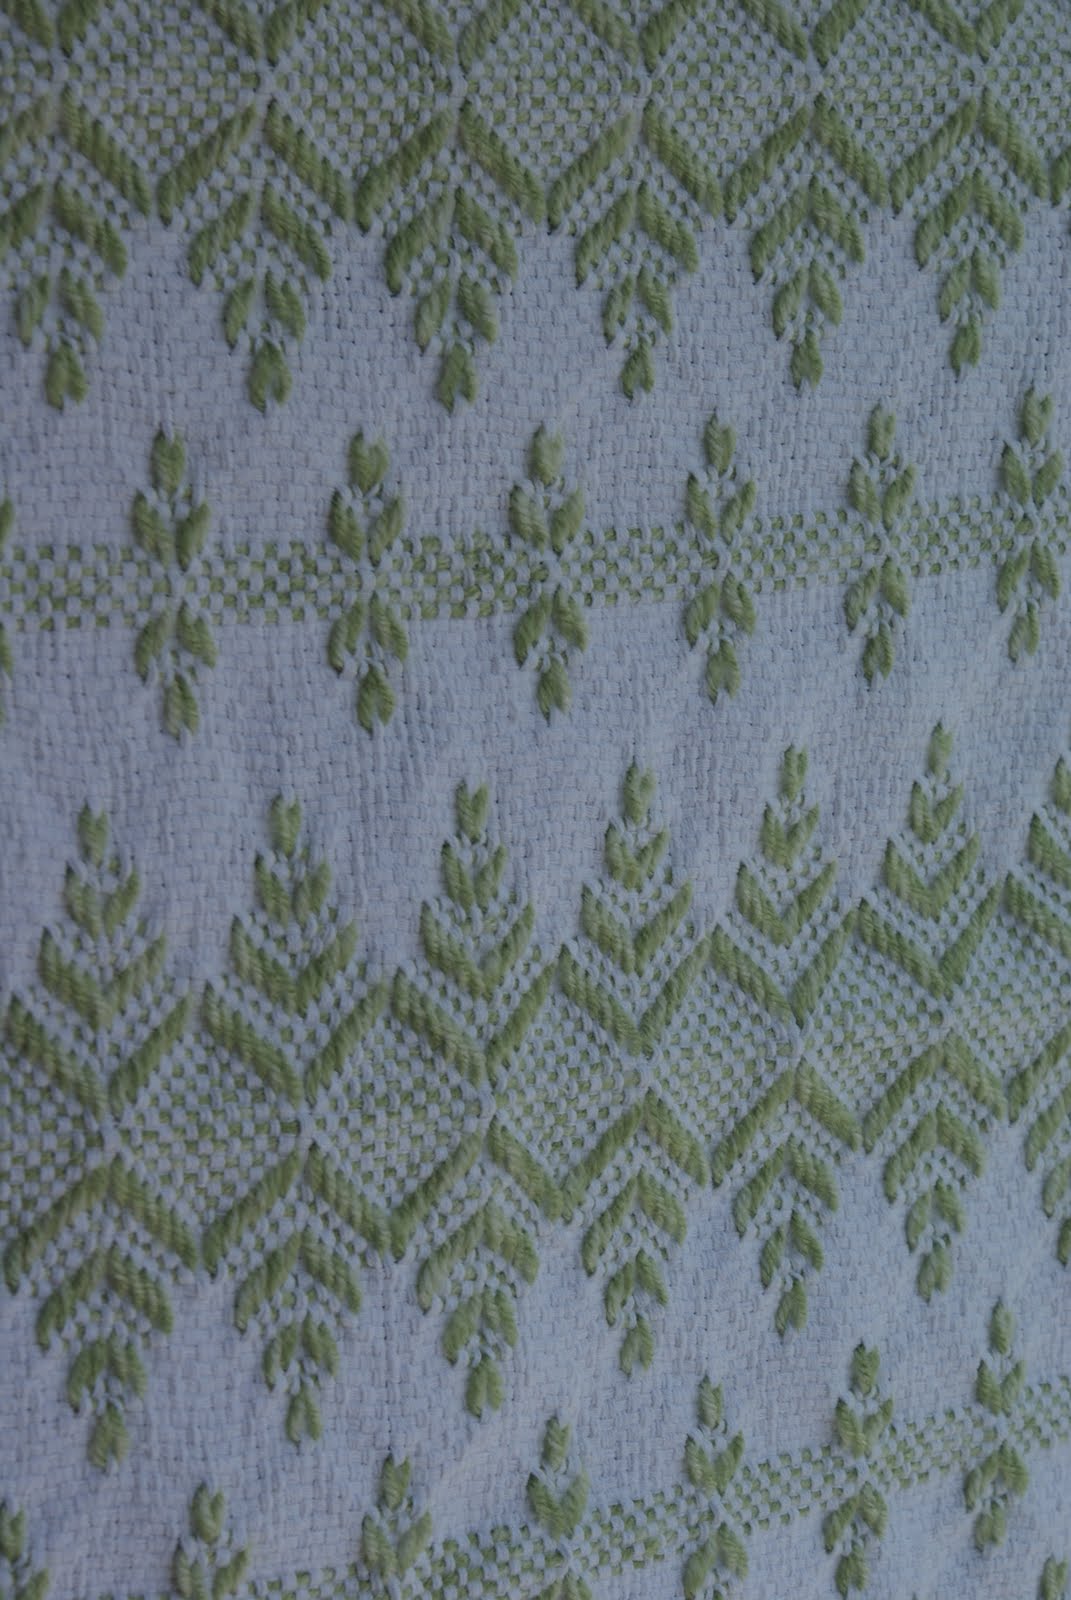
This is my first Sweedish Weave project. The pattern is called "Tree Design." It is just yarn woven through a piece of monks cloth.


According to Jeanette Coffin, owner and designer of Nettie's Needleworks, Swedish weaving is a form of embroidery. It actually dates back several centuries. In more recent times, this old needle craft has also been known as Swedish huck weaving, huckaback darning, huck embroidery and punto yugoslavo. In the 1930's and 1940's, Swedish huck weaving on toweling was so popular that many designs were created. Some of these designs have been adapted for use with Monk's cloth.

The beauty of this needle craft is that it only requires a few items:

  • Monk's cloth
  • 4-ply yarn
  • #13 yarn needle
  • scissors
  • pattern 
I will be teaching you the basics of Sweedish Weaving. To start you will need to get a pattern. I recommend Nettie's Needleworks. They sell many different beautiful patterns for a great price. They also have a nice variety of Monks cloth. Monks cloth will be what you weave your yarn into. You can buy it at Joanns Fabric and crafts but they only carry white and off white. If you wish to use another color you will need to purchase it somewhere else.

I will be using The Celtic Jewel pattern... 


This is what Monks Cloth looks like...


This is white Monks cloth before preparing it for Weaving.

TIP: If you buy the Monks cloth at Joanns be sure to tell them to follow the grid pattern when they cut it. If you get someone who doesn't know what they are doing and treats it like regular cotton fabric you will have to cut off a lot of the Monks cloth to get the sides straight.


This is my Monks cloth preparation assistant.
Just lay your Monks cloth out and follow the grid and cut a straight line on all four sides. You will need to go in as far as your shortest part of the material.

 See how crooked they cut it?


Look how much waste I had (insert angry scowl here). I was too chicken to say anything to the woman at the cutting counter.
Now it is time for your sewing machine. Set the stitch length to about a 2. You want the stitches to be small so they catch all the threads of the monks cloth and it stops it from fraying more then you want it to.


You will need to decide how much frayed edging you'd like. My project is a baby blanket so I don't want a lot of frills because I don't want it in the babies face. I went in 5. You just need to sew all around the monks cloth. It is really easy. Just follow the grid.


Learn from my mistake. Cut off the selvedge edge BEFORE you sew around it or you'll just have to cut it off afterwards. When you get to the end of one side leave your needle down and lift the presser foot. Then rotate it and sew down the other side. Make sure you keep the seams all the same size.


After you've finished sewing all around the Monks cloth, you will pull the extra off. You will get a nice frayed finish.

Once you've finished, put the Monks cloth into the washing machine on a gentle cycle. You can add mild detergent if you'd like. Don't wash it with anything else or it will agitate the fabric too much which will create lint balls all over the cloth. Dry the Monks cloth in the dryer on a normal high heat setting. The cloth will shrink a lot! For a baby Afghan I got 1 1/2 yds of cloth. 

There will be more to come. Feel free to leave a comment or email me if you have any questions. Happy Weaving.