Tuesday, December 13, 2011

DIY Gift boxes and Christmas Treats

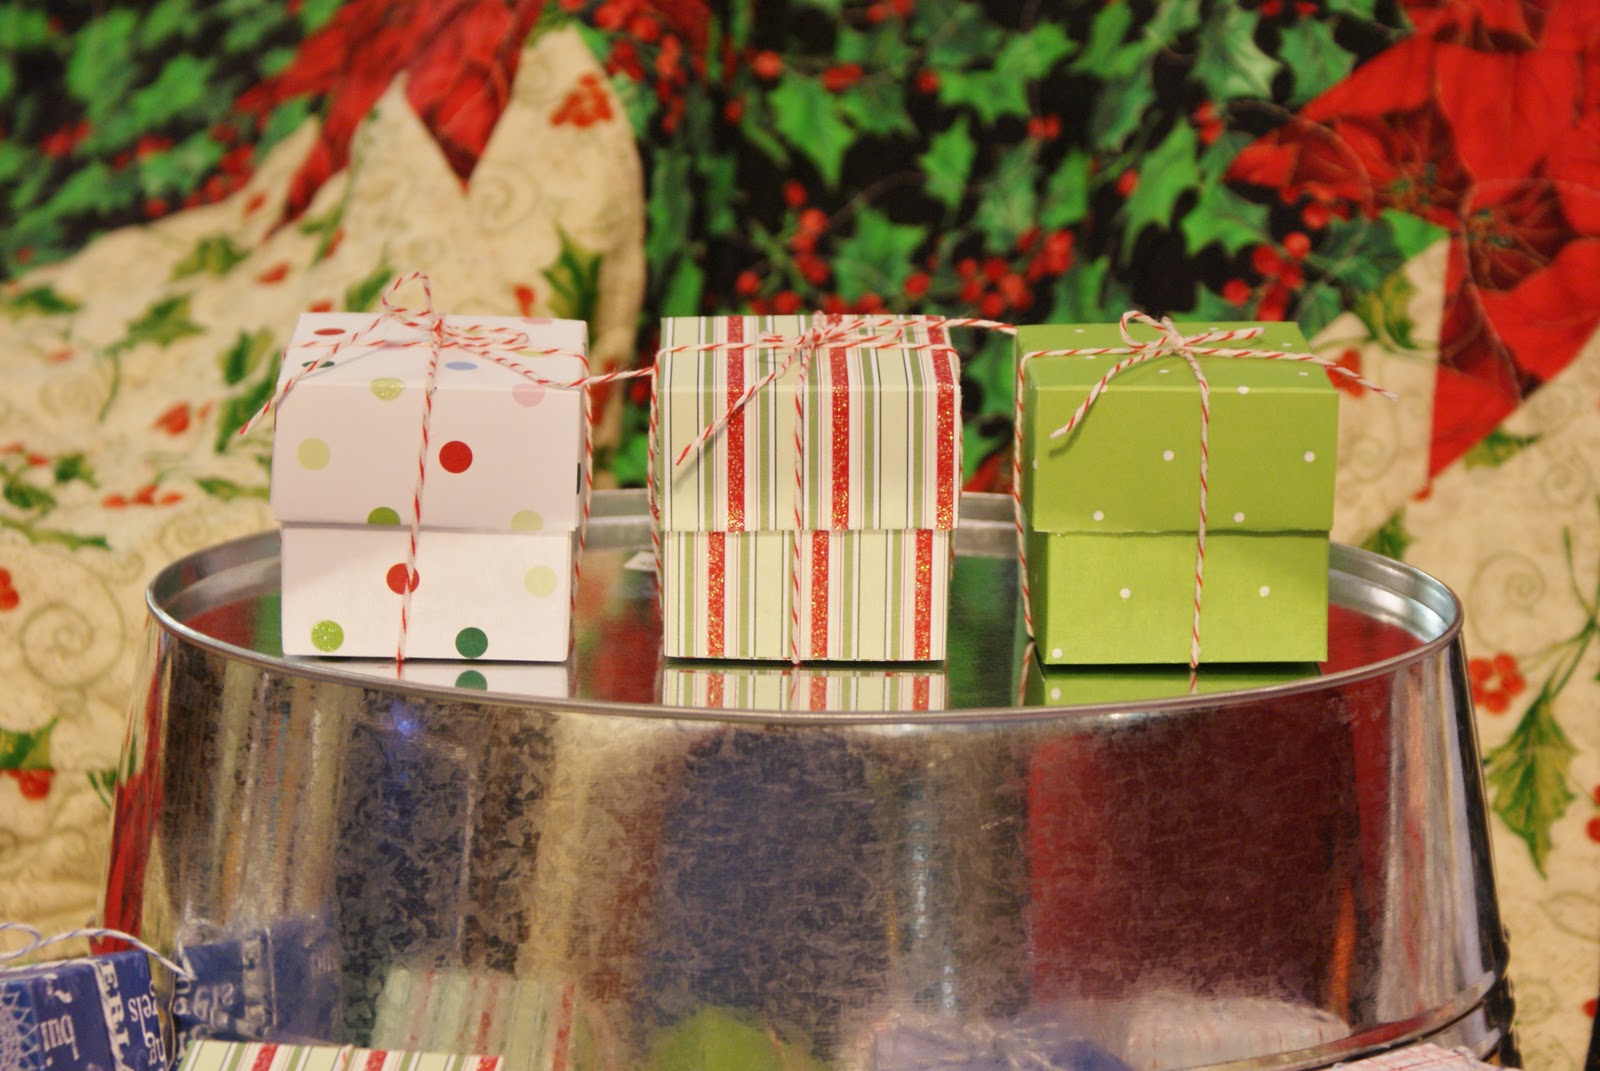
For my birthday my husband got me a Martha Stewart Score Board.

I have been having a lot of fun with it. I made 22 little gift boxes for my husband's colleagues and I filled each one with peanut butter melt-aways.


I'm not sure how my husband felt about carrying them into work in that tin. I think he would have preferred a cardboard box. I'm planning on posting a tutorial on how I made the boxes. Stay tuned for that.

Peanut Butter Melt-aways
1 lb  bag milk chocolate melting chocolate (I got mine 50% off at Joanns)
1 lb bag white melting chocolate
1 cup peanut butter

Pour both bags of melting chocolates into a microwave safe bowl in the microwave for 2 minutes. Stir the chocolate every 30 seconds until the chocolate is completely melted and smooth. Mix in 1 cup peanut butter until smooth. Pour the mixture into a waxed lined 9 x 13 pan. Place in the refrigerator to set. Once hard take out of the refrigerator and cut into pieces. When I take it out of the fridge to cut I usually let it sit out on the counter for 15-30 minutes so it is a little bit softer and easier to cut.

These are sooooo...good. They really do melt in your mouth.

Monday, December 5, 2011

Bird Haven

I found a wonderful shop on Etsy and I just had to share. I was looking for some bakers twine on Etsy when I came across Bird Haven. I loved the vintage spools with bakers twine on them but I wanted a variety of twine in a smaller quantity. I sent Bettie a message and she responded very quickly. She gave me exactly what I needed. Now she carries bakers twine samples in her shop.

Here are some of my favorite things from her shop.


I know I posted a lot of pictures from her shop but I really do love a lot of the stuff there. If there is something you like but it isn't quite what you are looking for just send her a message. She is so nice to work with. Please take a look at Bettie's shop and let me know if there is something you like. Maybe I could do a giveaway from her shop if I know what people would like (hint hint...cough...cough)

*if you want to pin any of these pictures please go to her shop and pin them from there*

Friday, December 2, 2011

Homemade Christmas Cards

If there is ever a time to make a homemade card I think Christmas is the time. What better a way can you show someone you care by taking the time to make them a card? I think a lot of times it seems like there is so much to do during this season that we just do things and check them off our list. Another reason to make your own Christmas cards is because it is very inexpensive. You can always make a bunch of the same cards. Here are some of the Christmas cards I've made this year.

 These are actually a pack of tags. There are a lot of different kinds in the pack. They all come with bakers twine so they can be attached to a package easily.


I made the ornaments out of wire and some decorative paper. I used my 2 inch circle punch.


This layout is a good use of scraps from the other cards.


This Santa stamp was $1.00 at Joanns. I used colored pencils to color him in.


This snowman stamp was also $1.00 at Joanns. He's so cute!


Another pack of tags. I'm on a tag kick lately. They are so much fun to make!


This snowman card is 4 x 4. I didn't have an envelope that size so I used my scoring board to make an envelope.

If you want to order a pack of Christmas cards now is the time. Don't wait too long or I won't be able to finish them in time.

Wednesday, November 23, 2011

Cheesecake Tarts

I don't really know what else to call these. I made up another recipe. I like to make treats for my husband to take into work for Holidays. This is what I came up with for Thanksgiving.


I used tart pans to make little pie crusts. Then I filled each crust with no bake cheesecake filling and topped each one with Cherry pie filling. The hardest part was making the little crusts and they weren't really hard...just time consuming. I couldn't find a recipe anywhere that I really liked that much so I improvised. Here is the recipe for you.

Cheesecake Tarts
  • 2 8 oz packages cream cheese (softened)
  • 3/4 cups white sugar
  • 1 small container of whipped topping
  • 1 tsp vanilla extract
  • 1/2 tsp lemon juice
  • 1 can cheery pie filling. (I like the kind with a lot of fruit in it)

Beat the cream cheese and sugar until smooth. Add vanilla and lemon juice. Then beat in whipped topping on medium speed. Beat for 2 minutes or until well blended. Scrap sides of the bowl during the 2 minutes of beating. Then place the filling in the fridge.


The crust is just regular pie crust.  I found the recipe on allrecipes.com.

Pie Crust
  • 1 cup vegetable shortening
  • 3 cups all-purpose flour
  • 1 teaspoon salt
  • 1 cup cold water
Mix shortening, flour, and salt together with a fork or a pastry blender until very crumbly. Add as much water as needed to hold together, and mix lightly with a fork.  

I rolled my pie crust out on waxed paper that was dusted with flour. Then I took my tart pans and placed them on the crust. I cut the pie crust around each pan about an inch larger then the edges of the pan. Then I placed each pie crust into the tart pans. Just gently press it into the bottom and then sides. Then you use your fingers and the edge of the pan to take off the excess crust. Poke holes in the bottom and sides of the crust before placing it in the oven so it doesn't get air pockets and loose it's shape. Bake at 425 for 15 minutes or until golden brown. When they are done baking and cooling fill each crust with the filling and top with a cherry.


This batch will make enough for 48. If you want a smaller batch just cut the recipe in half. But everyone will want to eat more then one because they are soooo...yummy!


And there you have it...Brielle's Cheesecake Tarts.

Tuesday, November 22, 2011

Pinterest

I am totally addicted to pinterest. I check my email every morning and then I check pinterest. And then in the evening I look through it again. I love to search for things and to pin things from all the wonderful blogs I read. Most of the things I see on pinterest and have tried are really awesome and work out great. I've tried a lot of things I've seen. There are a few things however that didn't turn out very well.

Frozen Fun


I saw this idea on pinterest from Counting Coconuts. My three year old LOVED this. I just used one of my Tupperware containers and I put a bunch of toys in it and filled it with water and put it into the freezer. I let him use my little crafting hammer and he went to town on the balcony. He broke up the entire block of ice. He asks to hammer the ice all the time now.


Here is my version with my little guy. The second time I did this for him he hammered at it for awhile and then he turned it upside down and threw it on the concrete and it broke into a bunch of smaller pieces. You should have seen how pleased with himself he was.

Thumbprint Christmas Lights Card


Isn't this adorable? The original is from Meet the Dubiens. I've already made a few of these beauties. I used ink and my three-year-old's pointer finger. I had drew the wire with colored pencil first and then had him add his prints.

Here is my version.


Toilet Paper Roll Bird Feeder

I loved this next idea from The Moffatt Girls because we don't have any pine-cones and it was a good way to re-use something instead of throwing it away. Austin loved helping me and the birds loved it too. I tweaked it a bit and punched two holes in the toilet paper roll so I could hang it from a string since I didn't have a tree to put it on. I hung it on my balcony instead.


CAUTION!!! Your three year old might unroll all the toilet paper off a new roll to get at the cardboard roll underneath so he can make another bird feeder. Just saying... :)

Scratched DVDs

This next pinterest saved me a lot of money. The original idea came from The Handmade Dress. Almost all our DVDs that my son watches were scratched and skipped in a bunch of places. It made me so mad because DVDs aren't cheap. I tried this out and it really worked. I used oral B stages kids toothpaste but I think any kids toothpaste would work. 


Paper Pumpkin Lanterns
I just have to say right off the bat that this next pin came from one of my favorite craft blogs that I look up to and I will continue to follow and copy lots of ideas from. Little Birdie Secrets. Her version of this pin looks awesome. So awesome in fact that I attempted it myself before our church Trunk or Treat. I failed. It was not easy to do and it was not worth the effort and time. And the little lanterns looked nothing like pumpkins. I showed my husband a few and he told me I should probably re-visit the blog. Hehe thanks honey. But yes it was a disaster. I followed it exactly and used the same supplies. I consider myself crafty but this just did not work for me. If it worked for you please leave a comment to let me know so I can maybe trouble-shoot to see what I did wrong. 

 
I don't have a picture of my version because it was too embarrassing. 


If you like any of the ideas you see here please click on the link I provided to the original creator so you can pin it from their site. That way when someone re-pins it they will be lead back to the creator's site. 

Thanks for stopping by and...Happy Pinning.